Understanding Your Deposit
This guide walks you through the complete SynthOS experience, from connecting your wallet to managing your yield positions.
Phase 1: Setup (One-Time)
Step 1: Connect Your Wallet

Two ways to connect:
Option A: Social Login (Recommended for Beginners)
- Sign in with Google, Apple, or email
- Creates an embedded wallet automatically
- Gas fees sponsored for initial transactions
- No browser extension needed
Option B: EOA Wallet (For Experienced Users)
- Connect MetaMask, WalletConnect, or other Web3 wallets
- Use your existing wallet and addresses
- You manage your own gas fees
- Full control over private keys
What happens next:
- SynthOS creates a smart wallet for you on Scroll
- This smart wallet will hold your vault and execute transactions
- Your login wallet is just for signing - funds live in the smart wallet
Step 2: AI Analyzes Your Activity
Once connected, the AI immediately begins analyzing:
What it scans:
- Last 30-90 days of transaction history
- Protocols you've interacted with across DeFi
- Types of strategies you've used (lending, LP, staking)
- Average position sizes and hold durations
- Chains you're most active on
Analysis time: 2-3 minutes for comprehensive profile
Your DeFi Profile includes:
- Experience Level: Beginner, Intermediate, or Advanced
- Risk Tolerance: Conservative, Balanced, or Aggressive
- Preferred Chains: Which networks you use most
- Strategy Preferences: Lending, liquidity provision, staking, etc.
New wallet? If you have no DeFi history, AI defaults to conservative recommendations. As you use SynthOS, it learns your preferences.
Step 3: Create Your Personal Vault

What is a vault? When you create a User Vault, you're not making a new wallet - you're creating a personal smart contract that SynthOS uses to manage your yield strategies.
Why you need a vault:
- Your wallet can't track strategies or manage cross-chain deposits
- The vault keeps all your positions in one place
- It updates automatically when deposits/withdrawals complete
- It can be upgraded over time without affecting your wallet
Key properties:
- One vault per user on Scroll (your "home base")
- Non-custodial: Only you control deposits/withdrawals
- Beacon proxy pattern: Gas-efficient upgrades without changing your address
- Cross-chain tracking: Monitors positions on Arbitrum, Base, Optimism, etc.
Gas cost: ~$0.05-0.10 on Scroll (one-time fee)
Phase 2: Depositing & Allocating
Step 4: Deposit Base Assets to Your Vault

What to deposit:
- USDC: Main asset for yield strategies
- ETH: For gas fees on transactions
How much ETH?
- Minimum: ~$5 worth for gas fees
- Recommended: ~$10-20 for multiple transactions
- ETH stays in your smart wallet for gas, not in the vault
How much USDC?
- Minimum varies by strategy (typically $10-100)
- Start small to test the system
- You can deposit more anytime

Deposit methods:

- From your EOA wallet: Transfer from MetaMask or other wallet
- From another chain: Bridge from Arbitrum, Base, etc.
- Swap from other tokens: Convert ETH, USDT, etc. to USDC
Important: Assets deposited to your vault are idle (earning 0% yield) until you allocate them to strategies. Think of your vault as a staging area.
Step 5: View AI-Recommended Strategies

After depositing, the AI shows you personalized yield opportunities:
What you'll see:
- Yield Bundles: Diversified portfolios of multiple strategies
- Single Strategies: Individual yield opportunities
- Risk levels: Stable, Balanced, or Growth
- Current APY: Updated hourly
- Protocol details: Aave, Morpho, Compound, etc.
- Target chain: Where the yield is generated
Filter options:
- By risk level (Stable/Balanced/Growth)
- By protocol (Aave, Morpho, etc.)
- By chain (Arbitrum, Base, Optimism)
- AI Recommended only
Step 6: Choose a Strategy
Option A: Invest in a Yield Bundle

What is a bundle? A curated portfolio of multiple strategies grouped by risk level:
- Stable Bundle: 3-5 low-risk strategies (blue-chip protocols)
- Balanced Bundle: Mix of established and newer protocols
- Growth Bundle: Higher-risk, higher-reward opportunities
Benefits:
- Instant diversification across protocols
- Reduced risk compared to single strategies
- AI-optimized allocation within bundle
- One-click deployment
Option B: Invest in Single Strategies

When to choose single strategies:
- You want full control over allocation
- You have strong conviction in specific protocols
- You're building a custom portfolio
- You want to avoid certain chains or protocols
Strategy details:
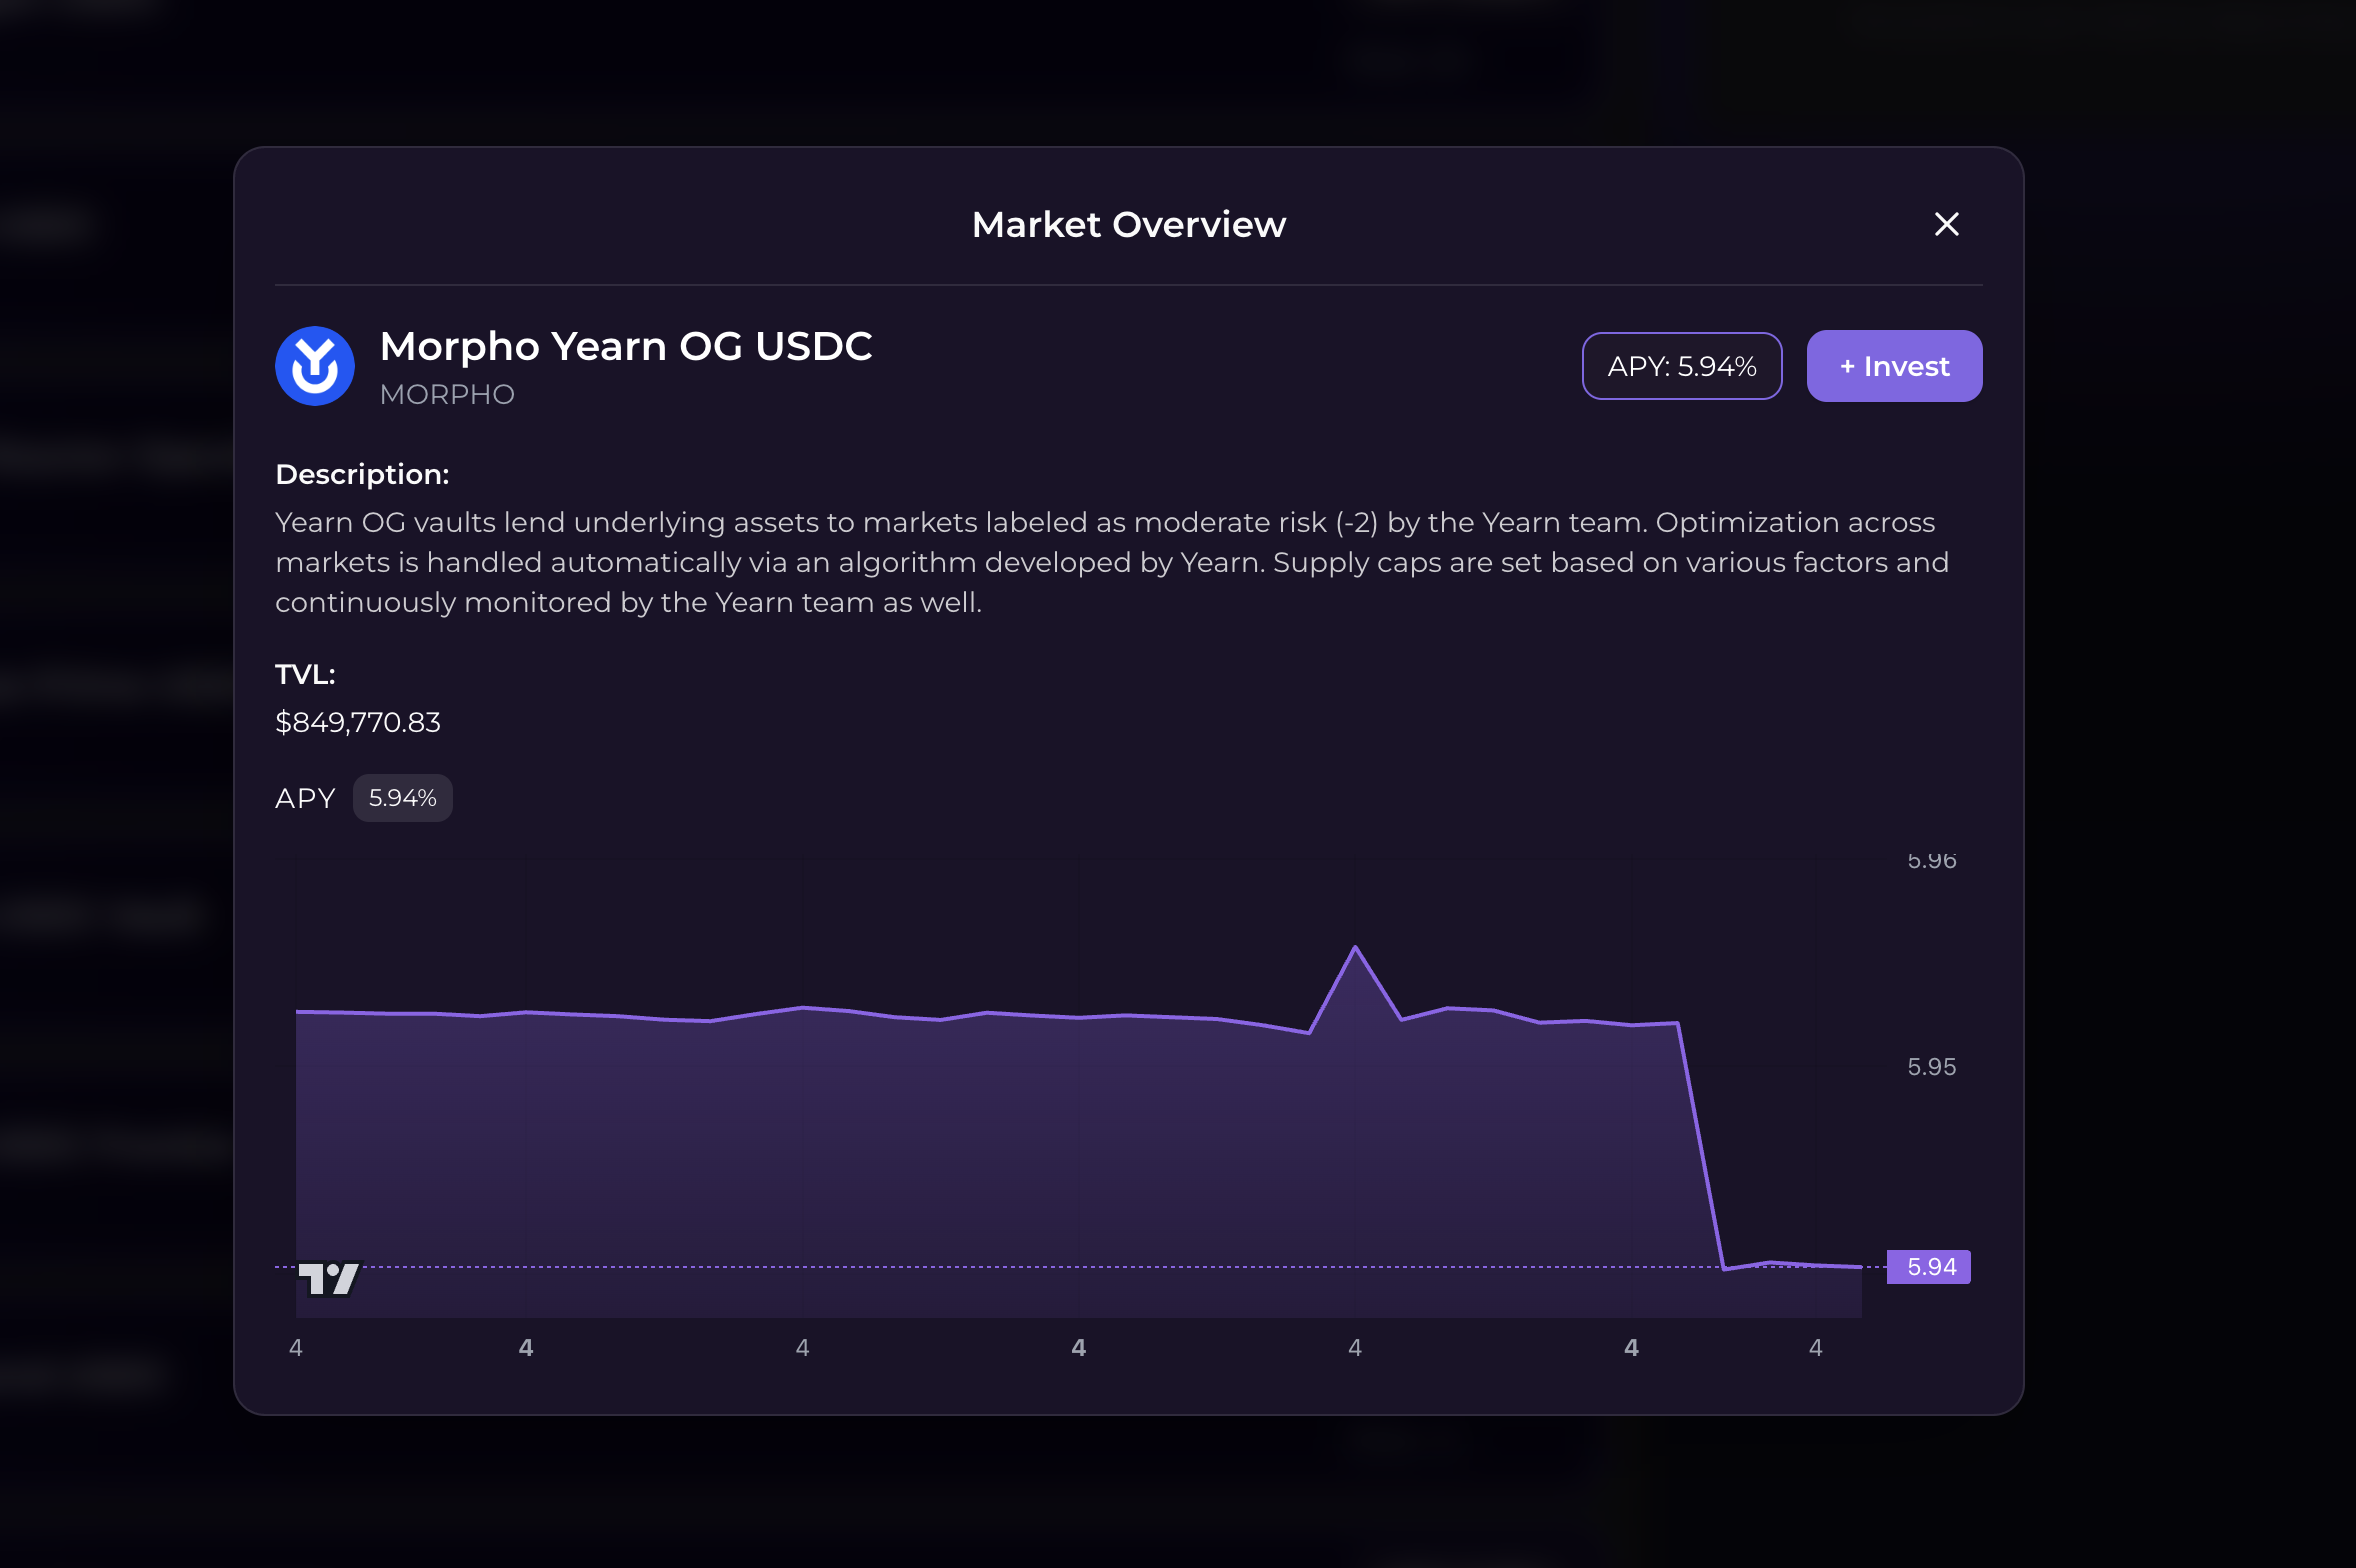
Each strategy shows:
- Current APY and historical chart
- Protocol name and audit status
- Total Value Locked (TVL)
- Your potential earnings calculator
- Risk rating (A+ to D)
- Minimum deposit amount
Step 7: Allocate Funds

Enter allocation amount:
- Must meet strategy minimum (varies by protocol)
Once confirmed, click "Allocate" to complete the transaction.
Phase 3: Cross-Chain Operations (The Important Part)
Understanding Cross-Chain Deposits
When you allocate to a strategy on another chain (e.g., Aave on Arbitrum), here's what happens:
Step-by-Step Process
1. You initiate (0 seconds)
- Click "Allocate" on the frontend
- Approve transaction in your wallet
- Transaction submitted to Scroll
2. Smart contract sends (10-30 seconds)
- Your USDC leaves your vault on Scroll
- LayerZero bridge message created
- Transaction confirmed on Scroll
3. Pending state (2-5 minutes)
- Your allocation shows as "Processing"
- LayerZero relays message across chains
- You can track progress via LayerZero Scan link
4. Bridge completes (varies by chain)
- Your USDC arrives on destination chain (e.g., Arbitrum)
- Destination vault receives your deposit
- You receive receipt tokens (e.g., aUSDC)
5. Validator confirms (0-60 seconds)
- Our validator detects bridge completion
- Calls your vault to update position
- Validator runs every 60 seconds
6. Position created (instant)
- Your position shows as "Active"
- You now hold receipt tokens tracked in your vault
- Yield begins accruing immediately
What You See During Processing

Pending operation card shows:
- Destination strategy and chain
- Amount deposited
- Estimated completion time (2-5 minutes)
- Current status (Processing → Confirming → Completed)
- LayerZero Scan link for real-time tracking
- Message GUID (for support if needed)
After 40-60 seconds: The validator confirms your deposit and your position becomes active.
Why the Wait?
Cross-chain operations need confirmation from the destination chain.
Without validator confirmation:
- Your vault wouldn't know if bridge succeeded
- You might see a position that doesn't actually exist
- Failed bridges wouldn't trigger refunds
With validator confirmation:
- Your vault only shows real, confirmed positions
- Failed bridges automatically refund to your vault
- You can trust your displayed balance
Same-Chain Deposits (Instant)
If you allocate to a strategy on Scroll (same chain as your vault):
- No bridging needed
- Instant confirmation
- Position active immediately
- Lower gas fees
Troubleshooting Your Journey
"My deposit is stuck in Processing"
Check:
- Click LayerZero Scan link in pending operation
- Verify message status (INFLIGHT, DELIVERED, FAILED)
- If DELIVERED, wait for next validator cycle (60 seconds)
- If FAILED, refund triggers automatically
Timeline:
- Normal: 2-5 minutes
- Congested network: 5-15 minutes
- If stuck >20 minutes: Contact support with message GUID
"I can't withdraw from a position"
Possible causes:
- Position is still "Processing" (wait for Active status)
- Insufficient liquidity in destination protocol (rare)
- You already have a pending withdrawal
Fix:
- Wait for position to become Active
- Try partial withdrawal instead of full
- Check "Pending Operations" for existing withdrawal
Next Steps
Now that you understand the complete vault journey:
- Read Key Concepts for deeper technical understanding
- Join our Telegram for community support and strategy discussions
Ready to start? Launch SynthOS App →